Winter kiting is in full swing, and when that means jumping on a flight and head for palm trees and trade winds for some, it means storm chasing in the Northern hemisphere for others.
In my case, I opted for the former last year, so to balance it out I’m staying in the UK this winter. And what a winter it’s been so far! The storms have been sweeping in almost every week, giving me a lot of rainy and gusty 7m sessions.
What to wear if you’re kitesurfing in the winter
You can enjoy these sessions a lot as long as you’re prepared for the conditions. One obvious adjustment is adding layers of neoprene to your outfit. What to wear essentially comes down to preference, but personally I’m wearing an old 5/3 with a thermo vest with built-in hood beneath.
In addition I’m wearing 3mm gloves and socks. This setup keeps me toasty all the way into January when I’ll likely switch to my drysuit.
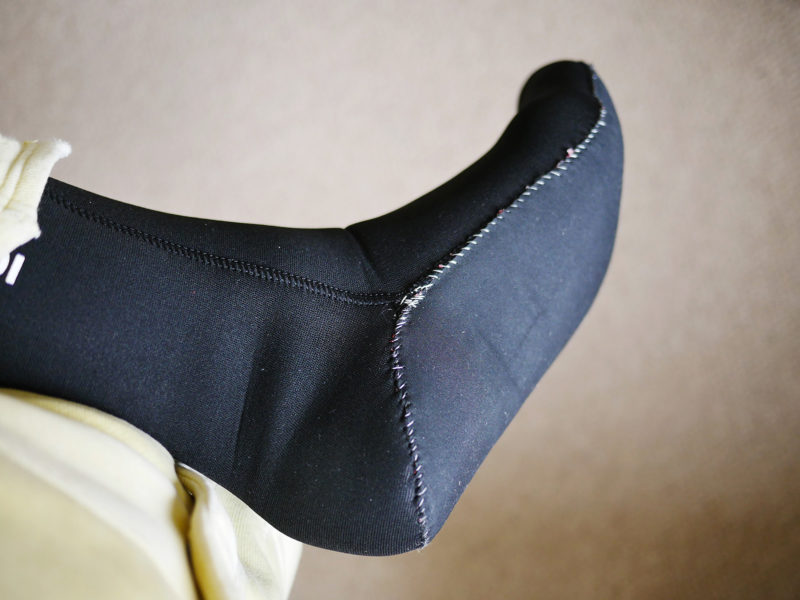
Reinforce your neoprene socks with kevlar
But this post is not so much about my winter setup as much as how to avoid buying new neoprene socks every season. These aren’t expensive, but waste is the enemy right? I like my latest find from C-Skins so much that I decided to try and make them last.
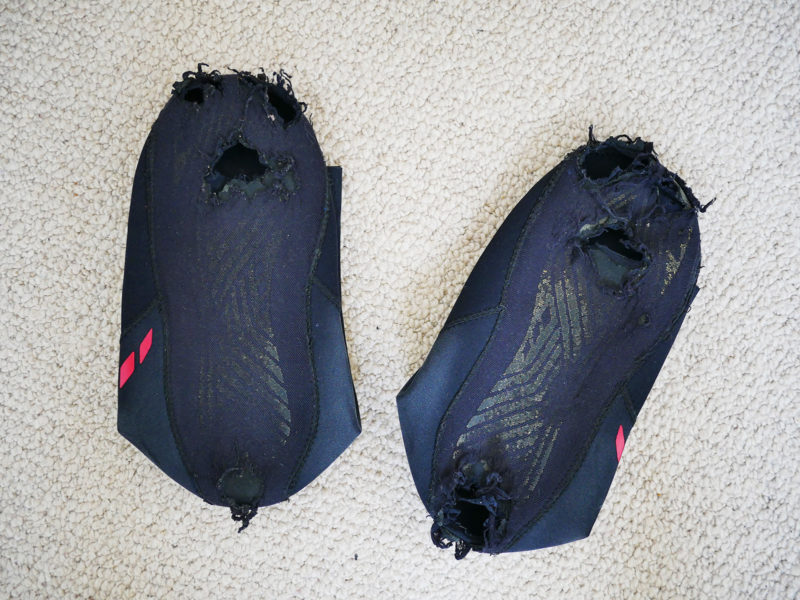
After using kevlar to reinforce my kite travel blag I kind of fell in love with this sturdy yet flexible material. It’s pretty much indestructible and can withstand all the scratches and cuts that your socks would normally be exposed to while walking on the beach, rocks etc.
A 30 x 30 cm patch set me back £20. This shit aint cheap! The C-Skins were another £20. Wow! Well, it’s an investment right? For that money I could buy cheap socks for four seasons to come. But hopefully my solution will last even longer than that.
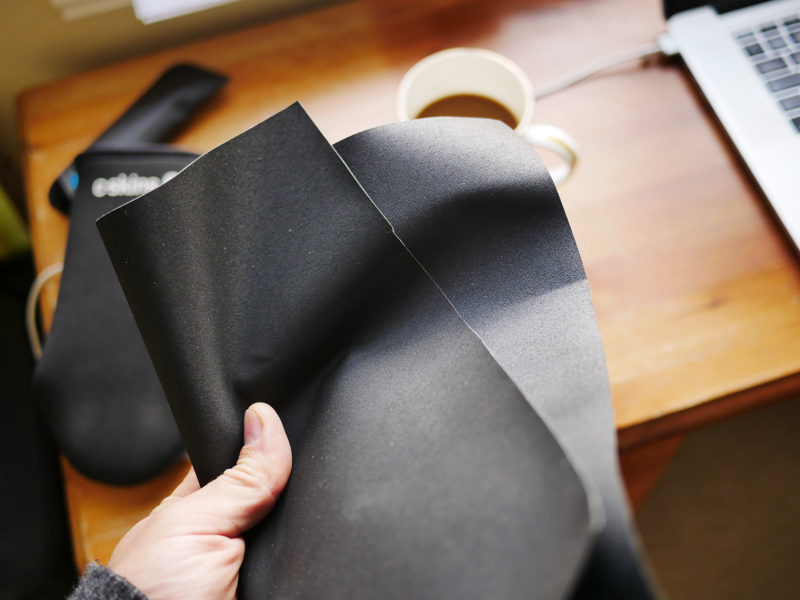
DIY kevlar soles for your neoprene socks
The kevlar is hard to cut with a pair of scissors, but with the right technique it’s fine. I found the best way is to use a large blade and make small cuts about a fourth from the tip of the blade.
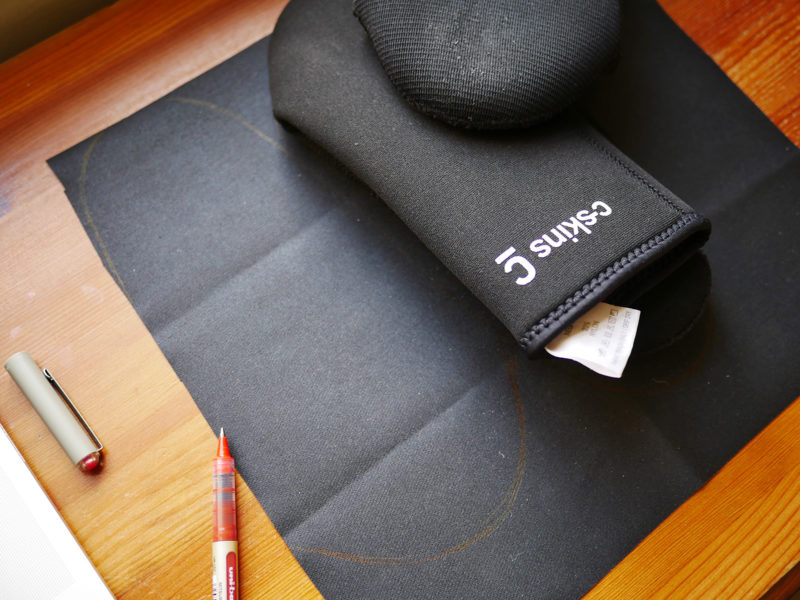
Cut out two pieces in the shape of the sole. Make sure it covers the heel and the toes completely as these are areas that will take a lot of beating.
Use neoprene glue or a water resistant fabric adhesive (I used Copydex) and glue the kevlar to the soles of the socks applying adhesive to both surfaces.
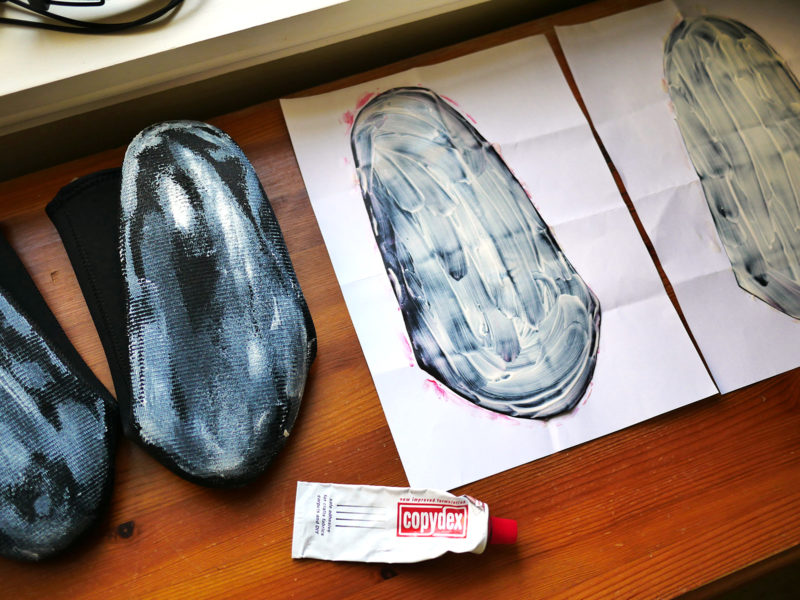
After the adhesive has bonded, use dental floss to stitch all the way around the soles.

And that’s it. Your socks keep their flexibility but will allow you to walk on rocks, concrete and whatever without wearing them out.
Thank you for sharing this. I riverboard down whitewater and socks always get tore up walking across rocks, gravel, and pavement. I even tried sticking the adhesive nonslip stuff that you stick on stairs to prevent slipping and even that wore through after one day. Adhering and sewing kevlar seems to be the ticket.